How do I set up eGIRO with Mari Savings Account?
Set up eGIRO on your Mobile Phone
To set up eGIRO on your mobile phone, refer to the steps below. For Desktop set up, you may also refer to the instructions after the mobile phone guide.
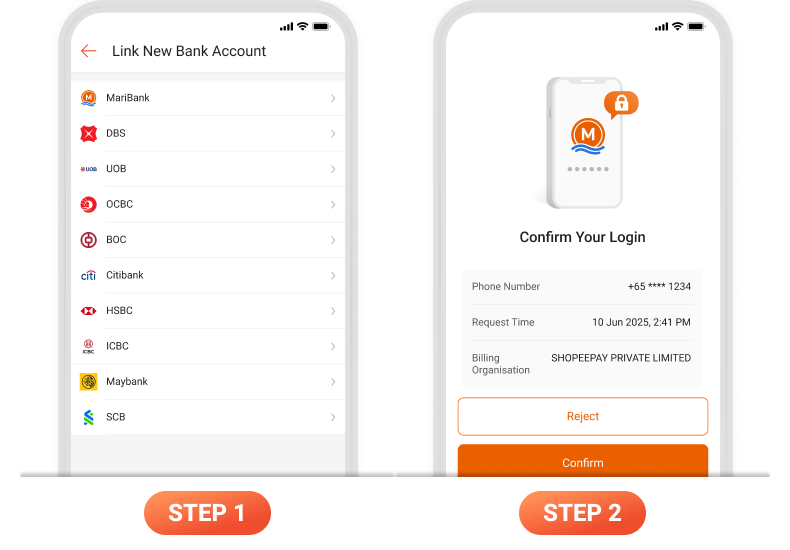
Step 1: Select MariBank on the Billing Organisation's app or website. If MariBank is not available as an option, please check with the Billing Organisation.
Step 2: Tap on the QR code shown and you will be redirected to the MariBank app to confirm your login.
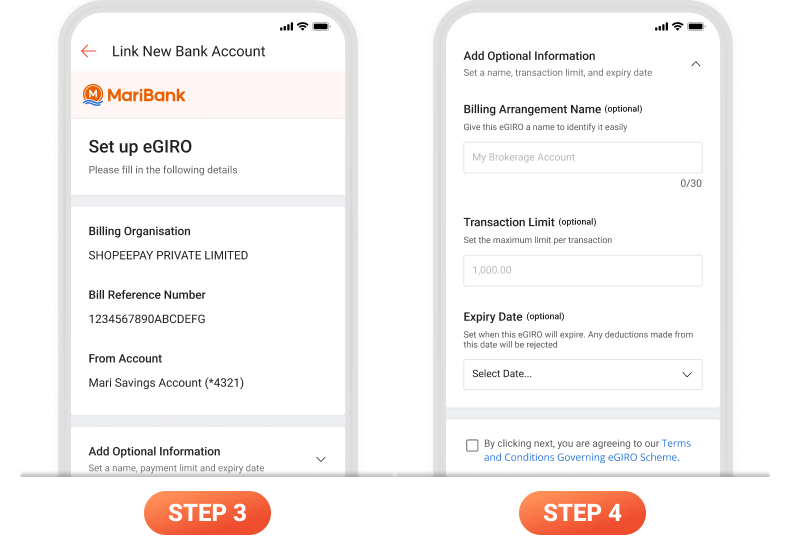
Step 3: After confirmation, return to the Billing Organisation’s app or website and select your Mari Savings Account.
Step 4 (Optional): You may also add in additional information such as payment limit and expiry date before clicking Next.
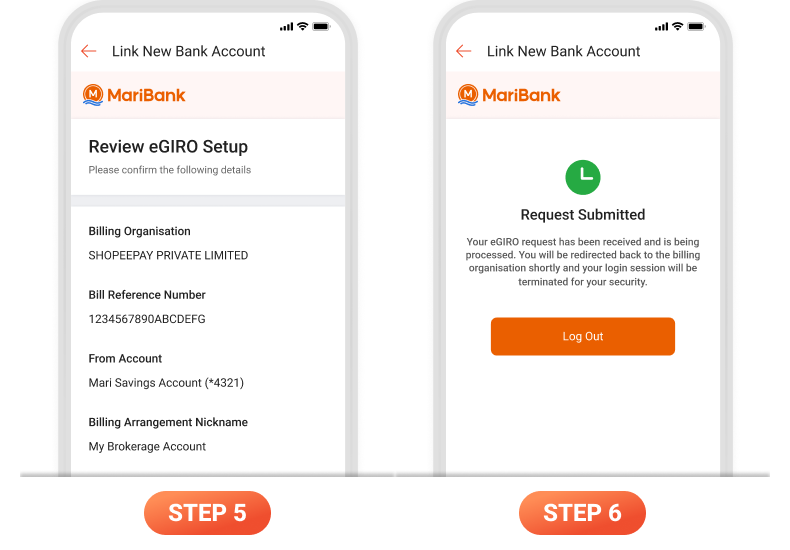
Step 5: Review your information before submitting the request. You will be prompted to confirm and authorise your eGIRO setup via the MariBank app.
Step 6: Once successfully confirmed, your request will be submitted and processed by the Billing Organisation. A notification will be sent to you once the eGIRO set up is completed.
Set up eGIRO on Desktop
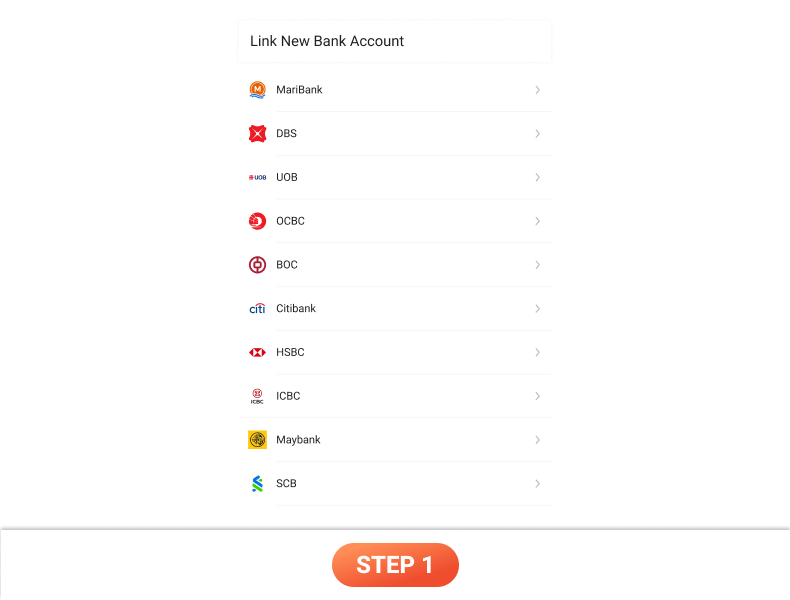
Step 1: Select MariBank on the Billing Organisation's website. If MariBank is not available as an option, please check with the Billing Organisation.
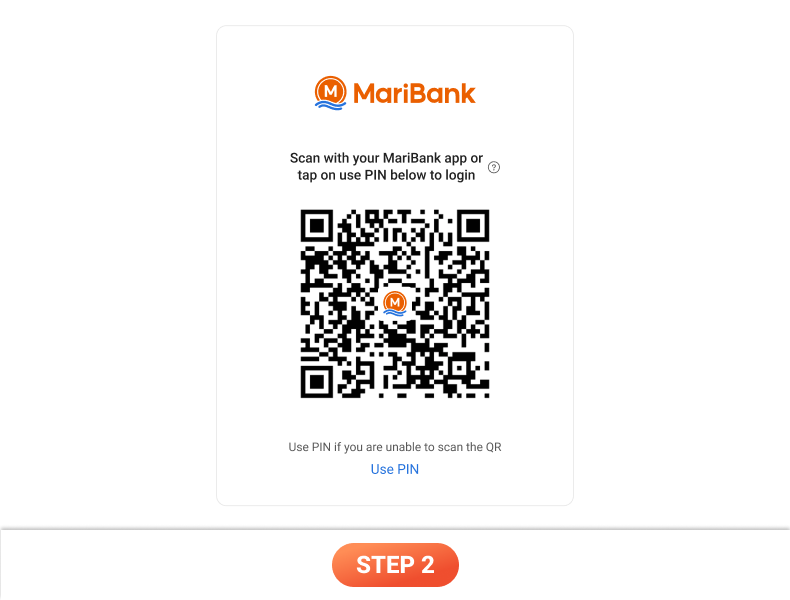
Step 2: Scan the QR code using your MariBank app to confirm your login.
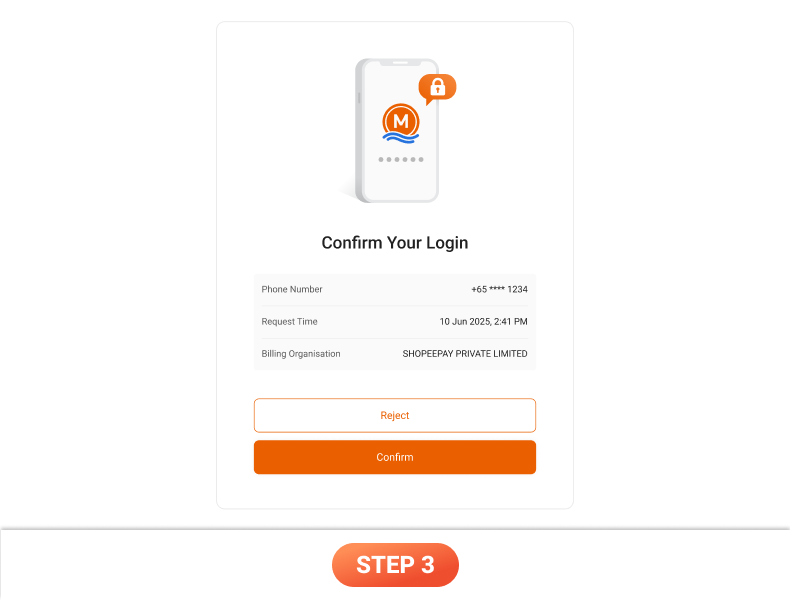
Step 3: Tap on Confirm to authorise your login.
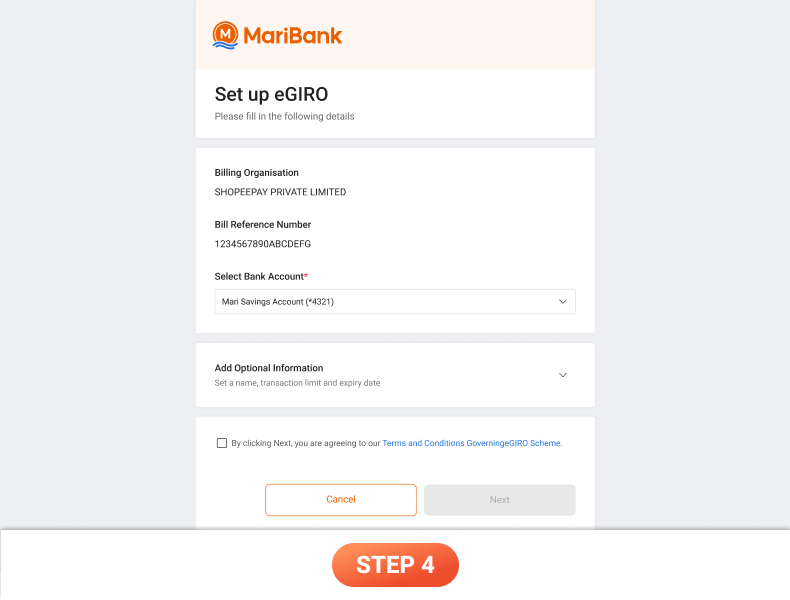
Step 4: After confirmation, return to the Billing Organisation’s website and select your Mari Savings Account. You may also add in additional information such as payment limit and expiry date before clicking Next.
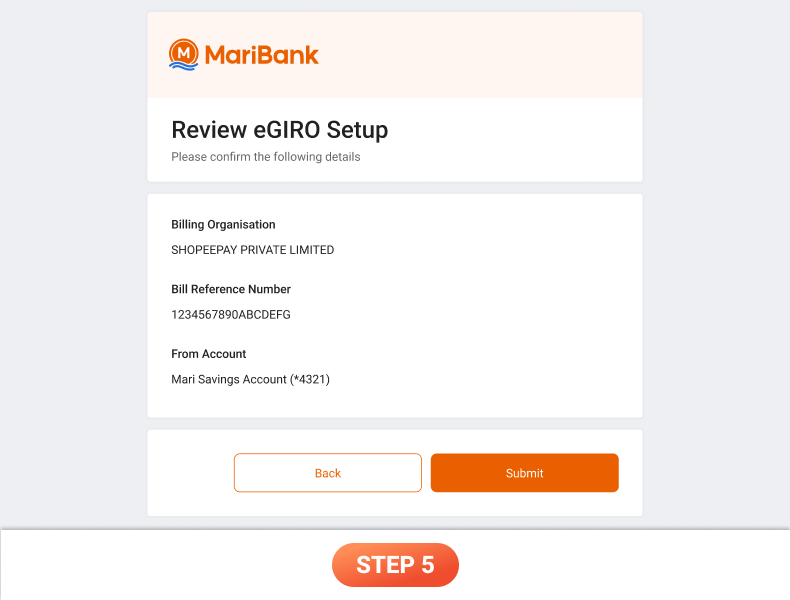
Step 5: Review your information before submitting the request. You will be prompted to confirm and authorise your eGIRO set up via the MariBank app.
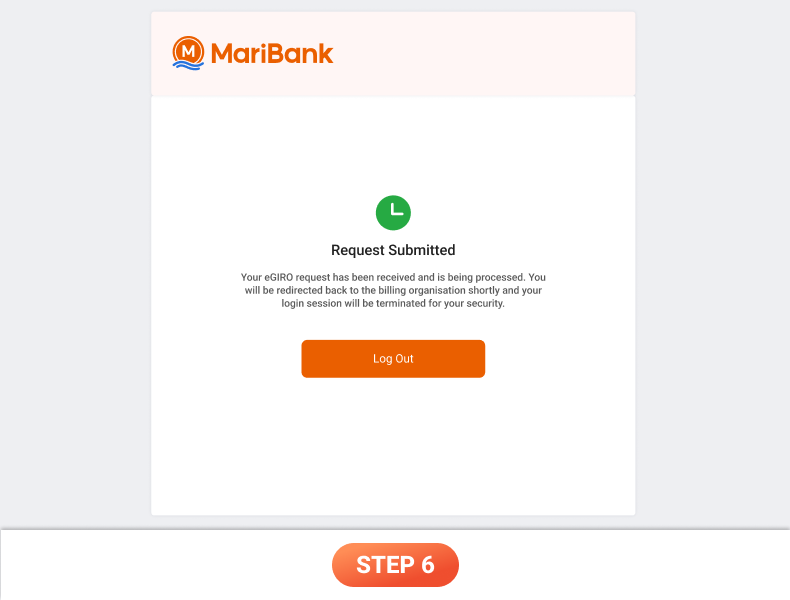
Step 6: Once successfully confirmed, your request will be submitted and processed by the Billing Organisation. A notification will be sent to you once the eGIRO set up is completed.
Contact Us
Our 24/7 Customer Service Team is here for you if you have any questions!


